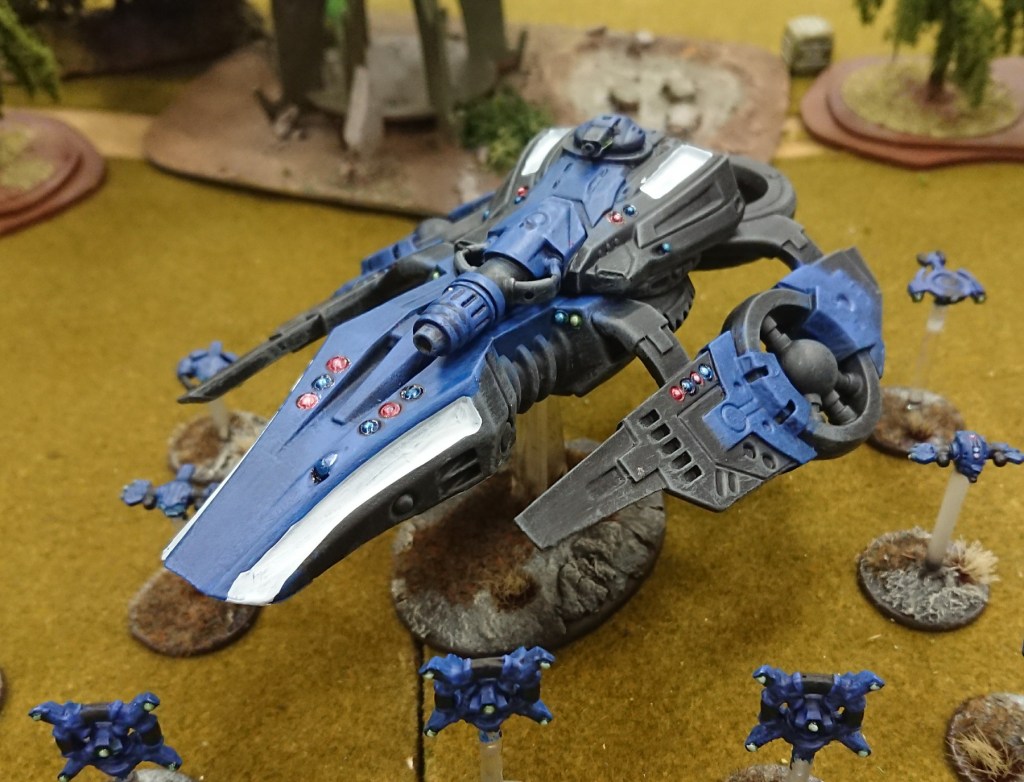
Conor Hind is well-known as being behind the till at Warlord’s HQ shop and he loves Antares. His eye was caught by the C3M25 Heavy Combat Drone, so he decided to work out how to assemble it, magnetise it and paint it as an integral component of his Concord force.
Practical Assembly
Conor: When I opened the C3M25 box set, one of the things I wanted to test was the miniatures ease of cleaning and assembly of this mighty drone. When it came to clean the model, there was very little resin flash, at worst there was a ring of excess flash on the ring characteristic with Concord drones; this was very easy to clean away with the edge of a hobby knife and only took me a couple of minutes to clean to a satisfactory quality. As for the mould lumps they were easy to find and very few, two on the underside of the prow and one on the back-piece’s joining insert being notable examples. Again, relatively straightforward to remove with side cutters and neatened with the edge of a knife.
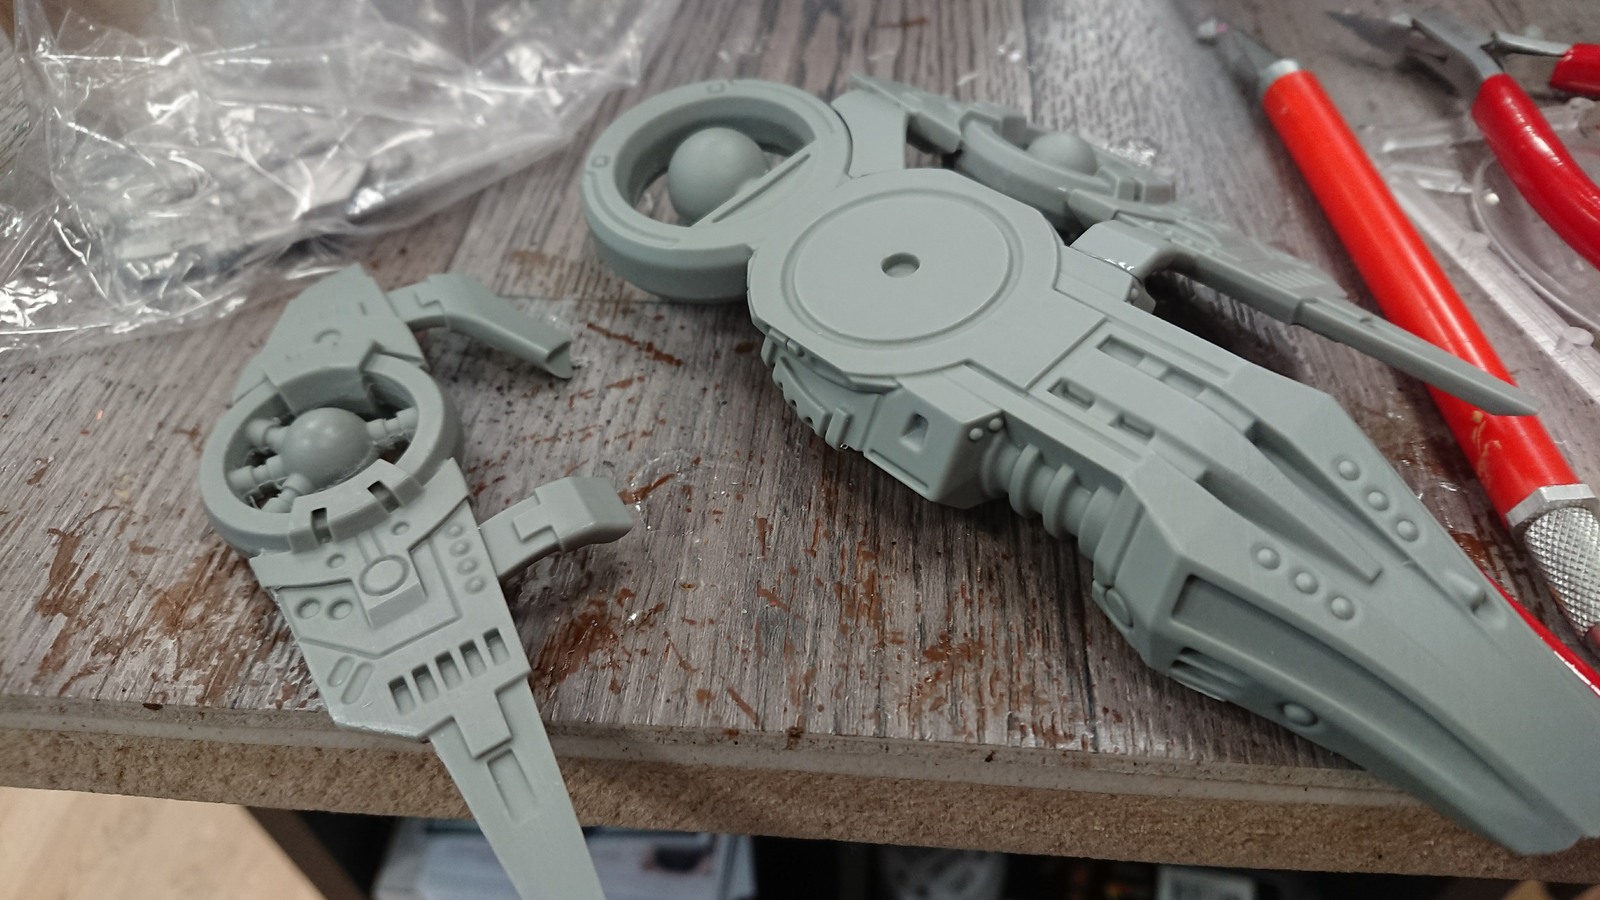
I cleaned and assembled piece by piece, starting with the main body, the back-suspension buoy, and the two wings being the only parts needing glue. With straightforward joins it was very easy to put together. I also put some super glue in the socket for both the main turret head and the light support weapon turret and left them to dry so that when the pieces are inserted, there is a stiffness that allows the turrets to still turn but they were not loose and wobbly. I did not glue the main gun to the turret because I wanted to explore the idea of having the available options without purchasing multiple tanks much like the M25s smaller cousin the M4.
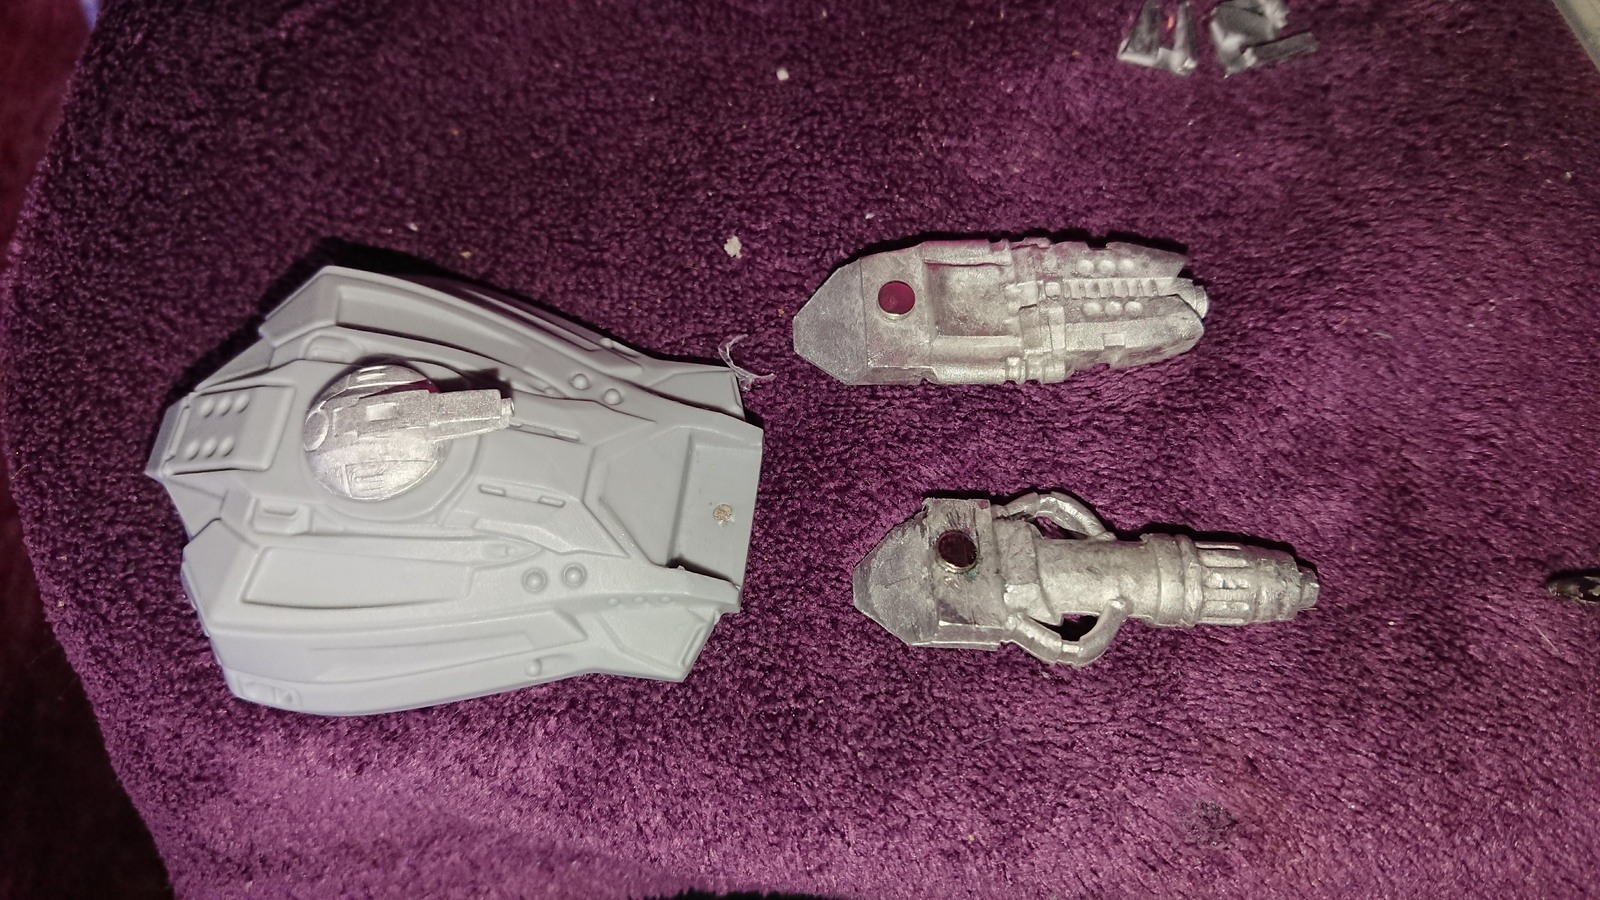
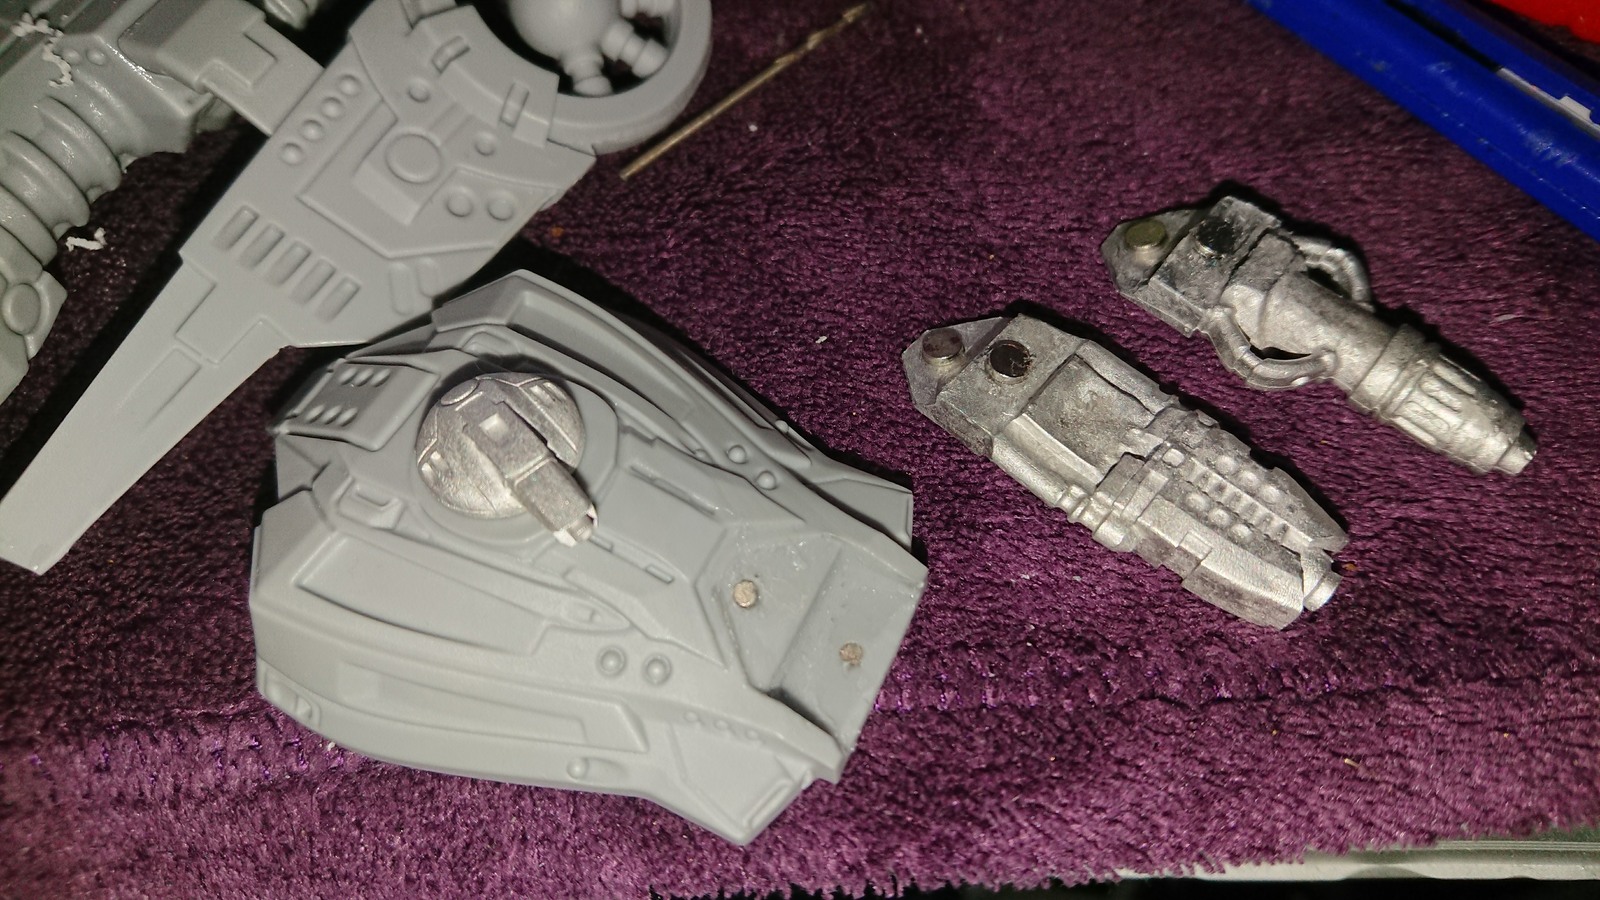
With that in mind, the immediate challenge was that the turret pieces were weighty metal parts and the turret wasn’t immediately designed to hold the gun in place without support from glue, so I looked at magnetising both the bombards. I began with a single 4x1mm magnet in the centre of mass for both guns which was before the gun barrel and a smaller 2x1mm magnet in the resin turret towards the edge of where the gun would sit normally. I drilled the 2×1 into the resin with my pin vice and the hole was wide enough to fit the magnet in without need of glue but the usual difficulties of getting the right poles meant I had to be careful before committing.
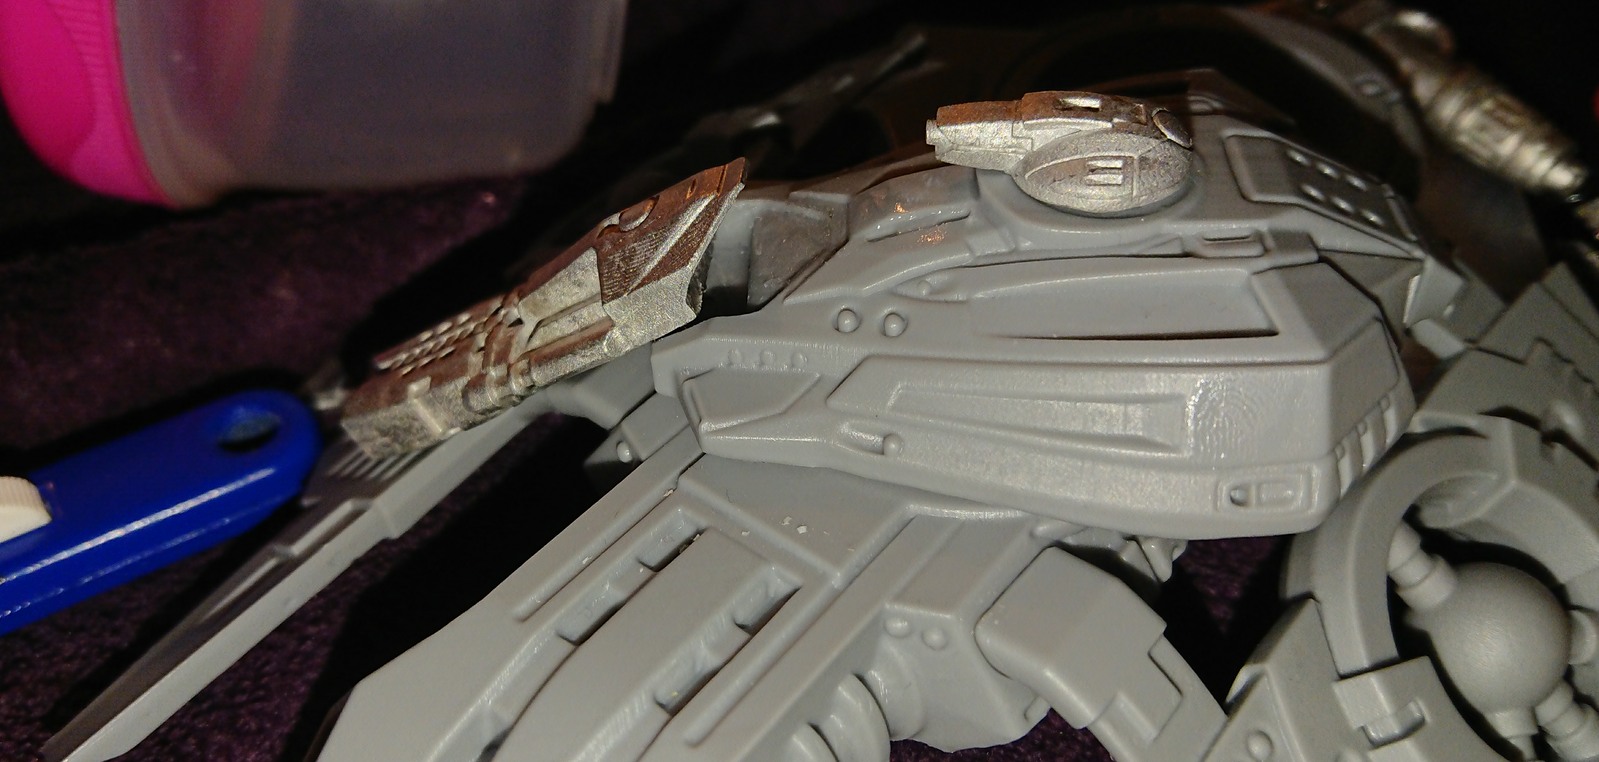
The single magnet would prove to be enough for the compression bombard to hold it in place with relative comfort, but it was not enough for the larger plasma bombard piece which was too heavy for the single magnet to hold. Instead, I decided to glue a second magnet on flatter slanted part of the gun and insert another magnet into the raised angular part of the turret. I did it to both Bombard pieces and this proved to be strong enough to hold both pieces in place, but it would fall out when turned which was a bit of a shame: next time I might use a larger more powerful magnet on the turret (and I’d probably want a more appropriately sized drill bit to have any success).


You must be logged in to post a comment.