Type: Narrative, Exploration objective
Equal Points: Force Level 1 or 2
A Virai swarm has buried itself in the wilderness, building a complex network of underground passages. Only some of these lead to the hive – and you don’t know which! Your force is dispatched to find and control the entry to the lair before any opposing faction: the secrets of the Virai must be denied to them!
Set Up
The game is run lengthways on a 6’x4′ table. For higher points, add width rather than length (so a 5′ wide by 6′ long table would be appropriate for high-end FL2 and even FL3 games, perhaps).
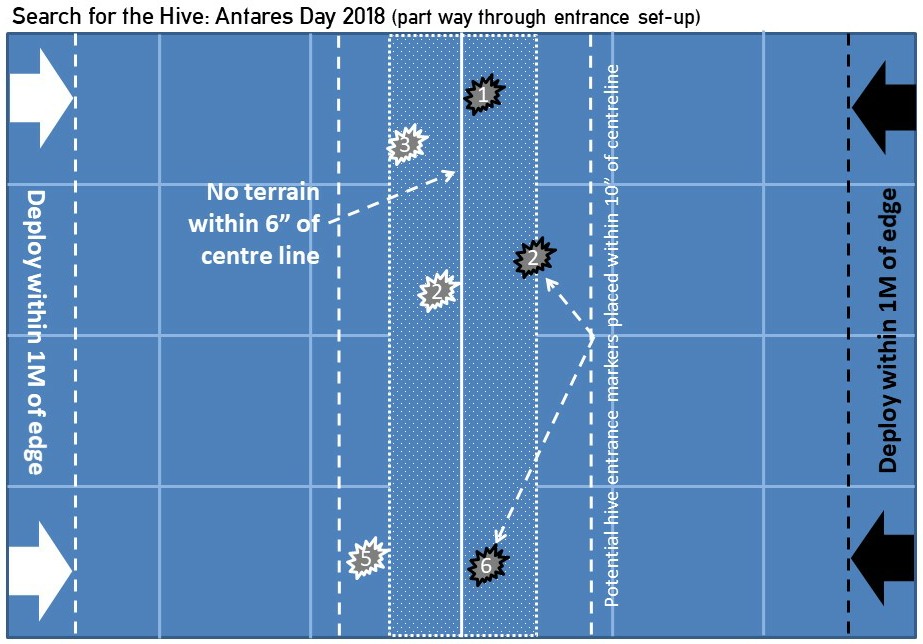
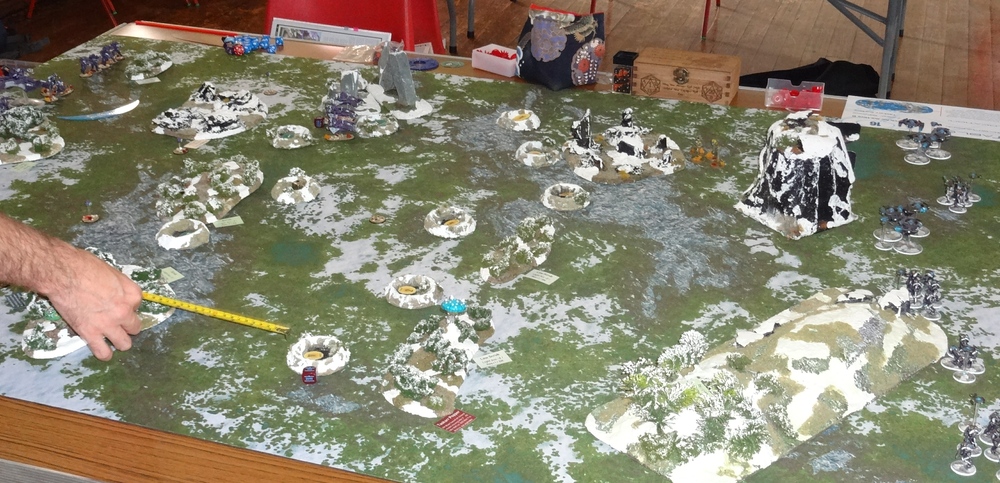
The table is covered in woods, swamps, ruins, rocky outcrops or similar wilderness terrain and the game is played longways on a 4’x6’ table: each force arrives on a short table edge. Whilst 12 items of terrain are used (15 on 5′ wide table), none should be placed within 6″ of the centreline.
Before the games starts, the players have to place the approximate entrances. Each player has six, 3” ‘Lair Entrance’ markers, all numbered and in the same colour. Dice to see who starts and each player lays the markers within 10” of the centreline on their own side of the table. None of the markers can be within 5” of each other or of the table edge – do shift them to fit!
Deployment
Both sides deploy as normal within 1M of their own, short table edge baseline. There is no attacker or defender in this scenario.

Objective
To find and control the passageways to the Virai hive and prevent your opponent from doing so.
Game Duration
The game is played until six turns have elapsed. Then roll randomly to see if another turn is to be played. Break points are ignored for this game.
Victory
| Outcome | VPs |
|---|---|
| Having a unit/model explore and confirm a Hive Entrance (there are two hive entrances!). | Score 1 victory point |
| Having at least one controlling unit in the Hive. | Score 1 victory point |
| Having a greater percentage of your order dice in the Hive than your opponent. | Score 2 victory points |
| To the Virai (if not involved and if part of a Dronescourge campaign). | Lowest VPs |
Special Scenario Rules
Exploration
To explore one of the possible entrances to the Hive, a non-beast unit or search probe that can fit down narrow (3″) passages need merely reach the token via any move as if leaving the table and declare it is exploring. The probe or unit can be left on the token or removed from the table, but is underground and cannot be harmed, or grant to, or use any other unit’s stats and capabilities.
Search probes are scout, targeter, tectorist, flitter and STAA probes, or similar, active, target-acquisition probes. Hound probes, for example, are just concerned with destroying other probes and medi-probes are concerned with casualties so are not search probes.
Narrow passages are navigable by models up to Medium size. No sprinting is possible and Run orders cannot be retained in the tunnels (if Fast).
Controlling units are as described in the Playing the Game supplement (p.15). Units that are Down are still counted as being able to establish control as a tactical decision to do so may well help their survivability, but at the cost of capability of course!
Underground Movement
Movement within the maze of tunnels is unhindered, but the side branches mean a unit will never meet another whilst underground. In subsequent turns, an underground unit/sharded model can:
- Stay underground – simply give the unit a Rally order.
- Return – from the end of an unexplored tunnel the unit entered as if exiting wit a Run or Advance order – it surfaces around and adjacent to the entrance down which it originally went. As it has already moved underground, the unit/model cannot move further after surfacing.
- Exit – from either end of an explored tunnel (movement can be fast!). Give the unit a Run or Advance order and it surfaces around and adjacent to the relevant exit marker. As it has already moved underground, the unit/model cannot move further after surfacing.
- Explore an unexplored tunnel it is in – give the unit a Run or Advance order and roll 1D6 on the exploration table, below.
| D6 | Result | Explanation and Marker Placement |
|---|---|---|
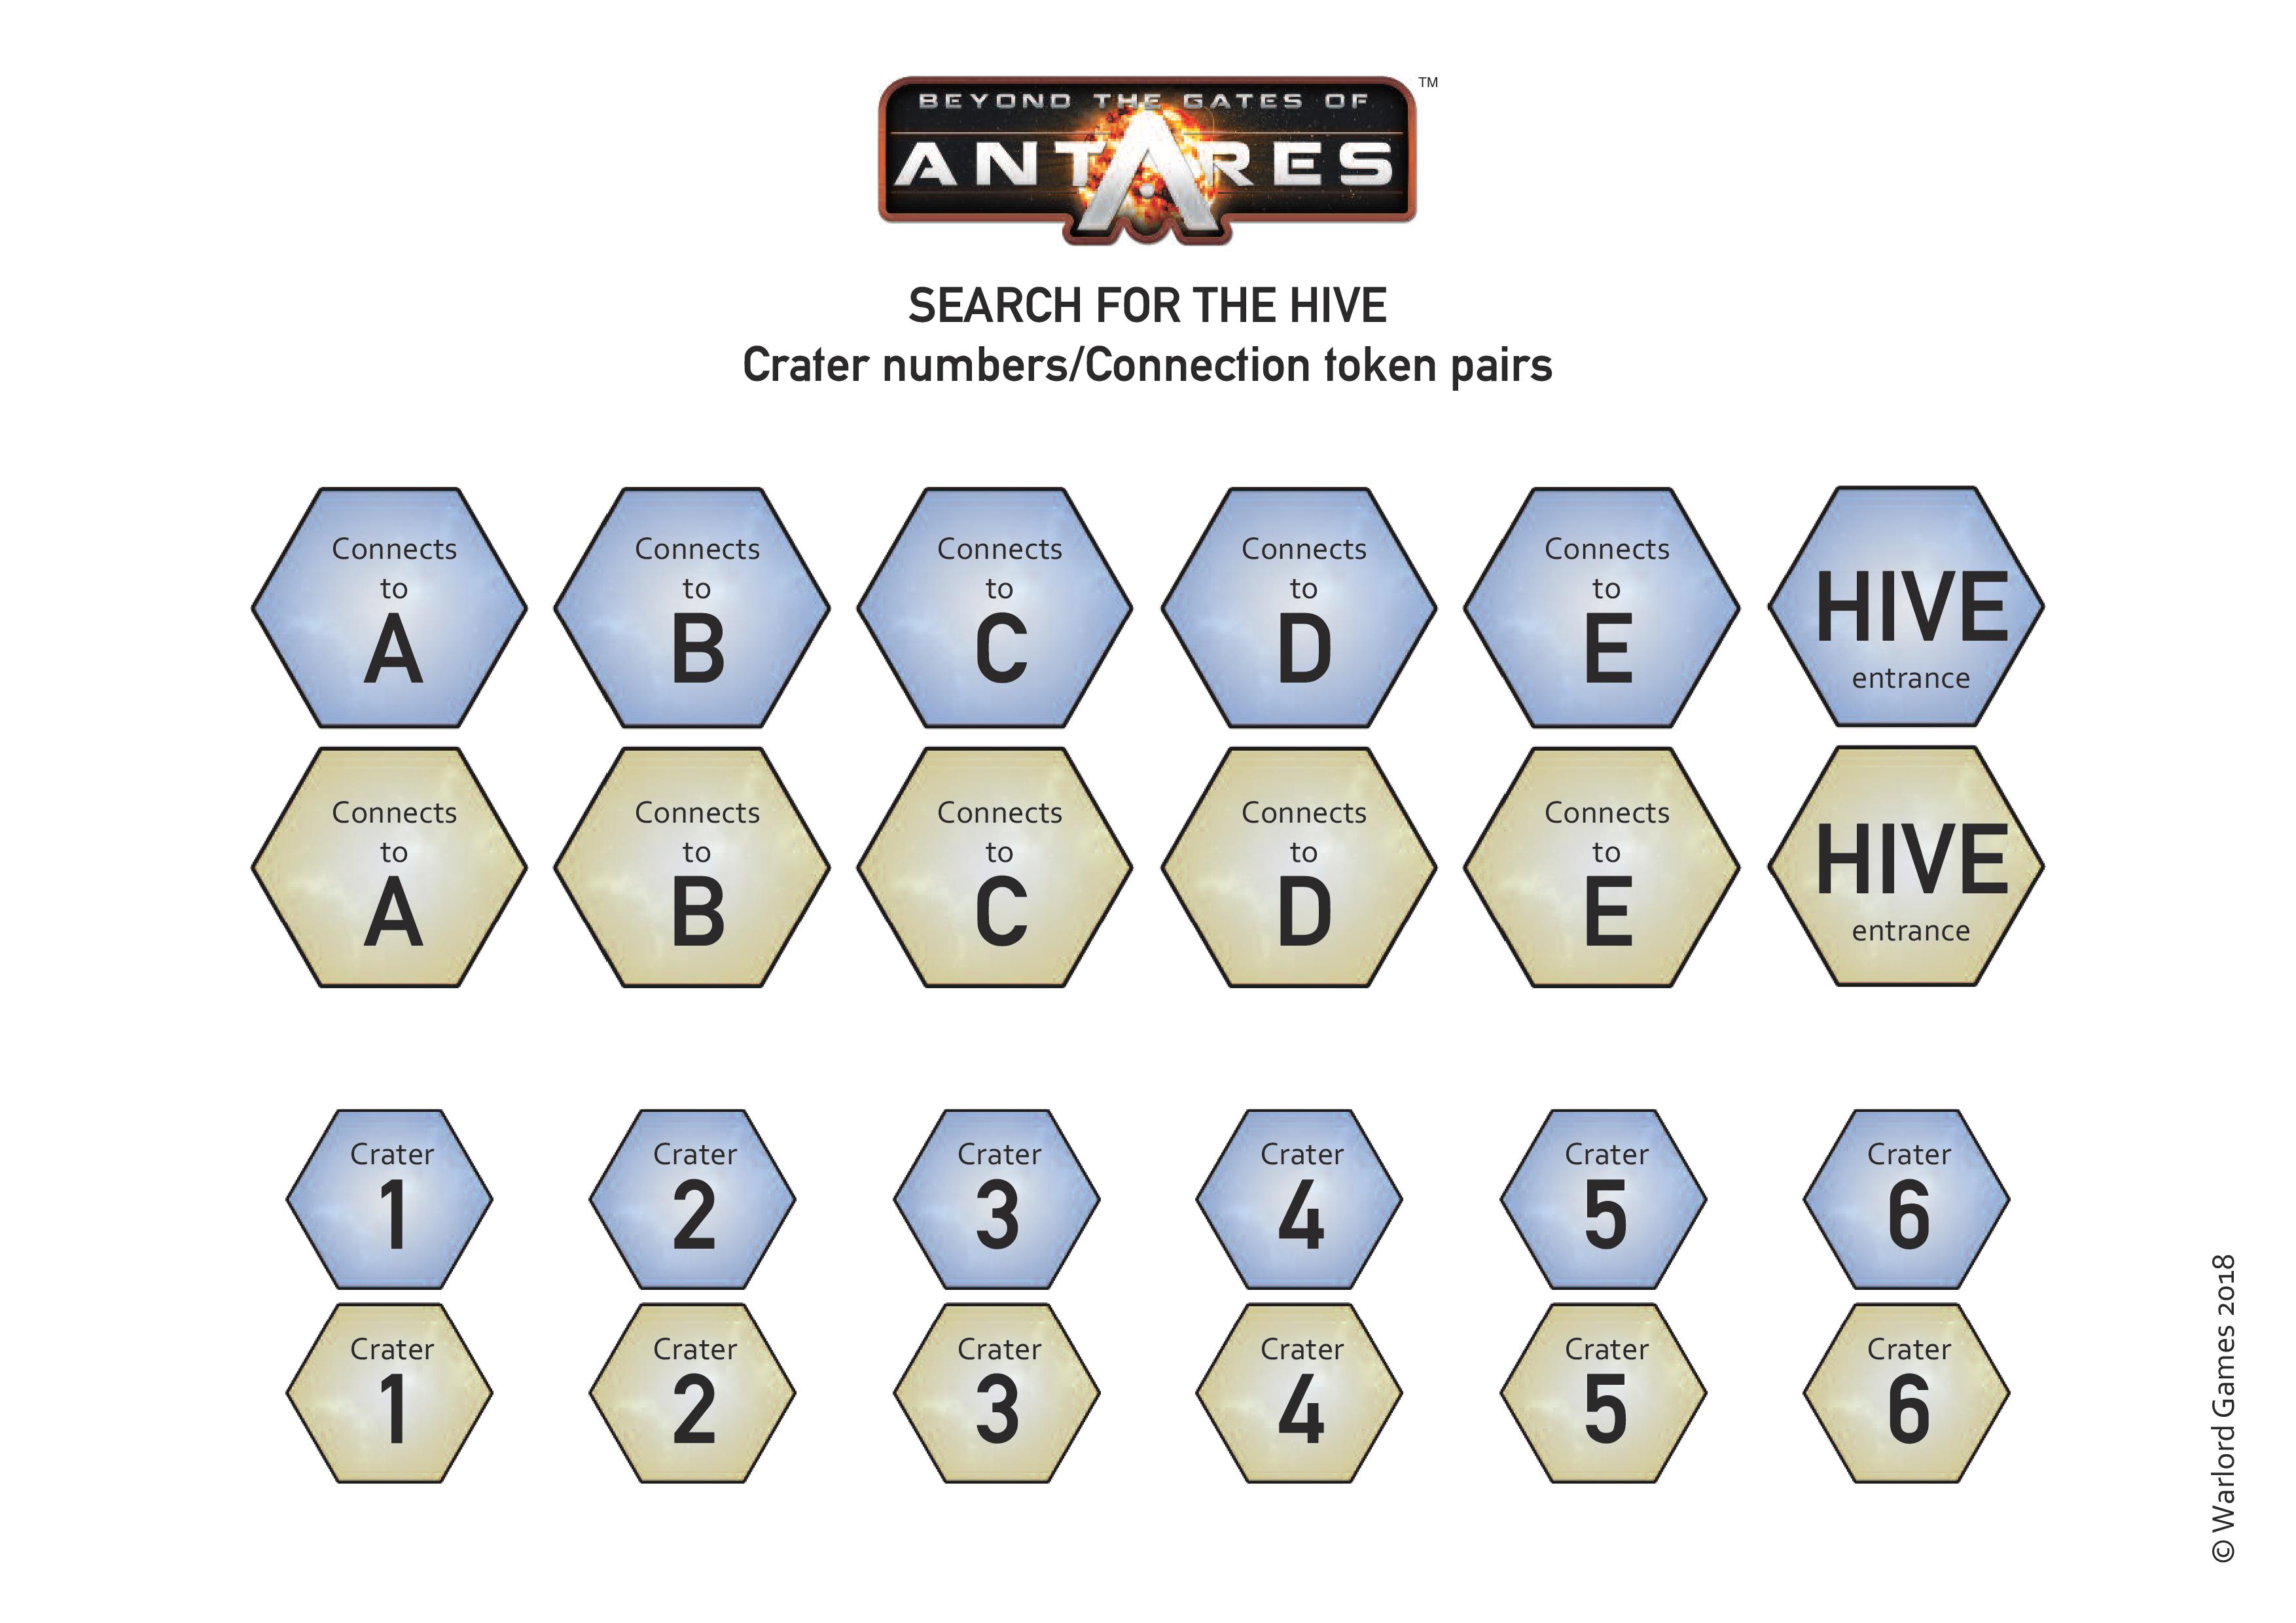
| 1-5 | Fake Tunnel | The result is that of your opponent’s entrance marker to which this one is connected. Place corresponding connection tokens (examples below marked A-E) on both entrances or otherwise record the connection. If the connection pairing has already been made, then roll or decide again. |
| 6 | Success! | The entrance leads to the Hive – place a ‘Hive Entrance’ marker on the tunnel entrance. An exploring sharded model is removed from the table; an exploring unit is removed from the table, with its dice, and counts as ‘In the Hive’ – not destroyed. If all other connecctions have been made, then the last connection pairing will be the Hive Entrance by default; the entrance will not count as having been ‘explored and confirmed’ though until a suitable unit goes down the tunnel to do so. |
It is possible that a player can go down one of the Lair Entrances (tunnel mouths) placed by their opponent. Their opponent still rolls the dice as everything is now from the opponent’s perspective!
Download
The studio have created a download for us containing a complete set of Search for the Hive crater/entrance and link markers. Download and cut them out for your own use. Alternatively, click on the image below, and download it for your own use.

You must be logged in to post a comment.